

Quick Summary: The Training Library is a centralized catalog of learning resources available to your organization. Admins build and curate the library, link resources to skills and careers, and assign them to employees. Employees can suggest new resources for admin review.
Overview
The Training Library gives administrators a single place to manage all training resources available in your organization. Each resource can be linked to specific skills and careers, assigned directly to employees, and tracked through completion. Resources in the library appear in employees’ Learning Plans when assigned, and employees can suggest new resources for admin approval. Who can use this feature:The Training Library appears only when the Training switch is on under Company > Settings > Hide Library Sections. See Page Settings. Contact your administrator if it is not visible.
Navigating the Training Library
Navigate to Library > Training in the left sidebar to open the Training Library.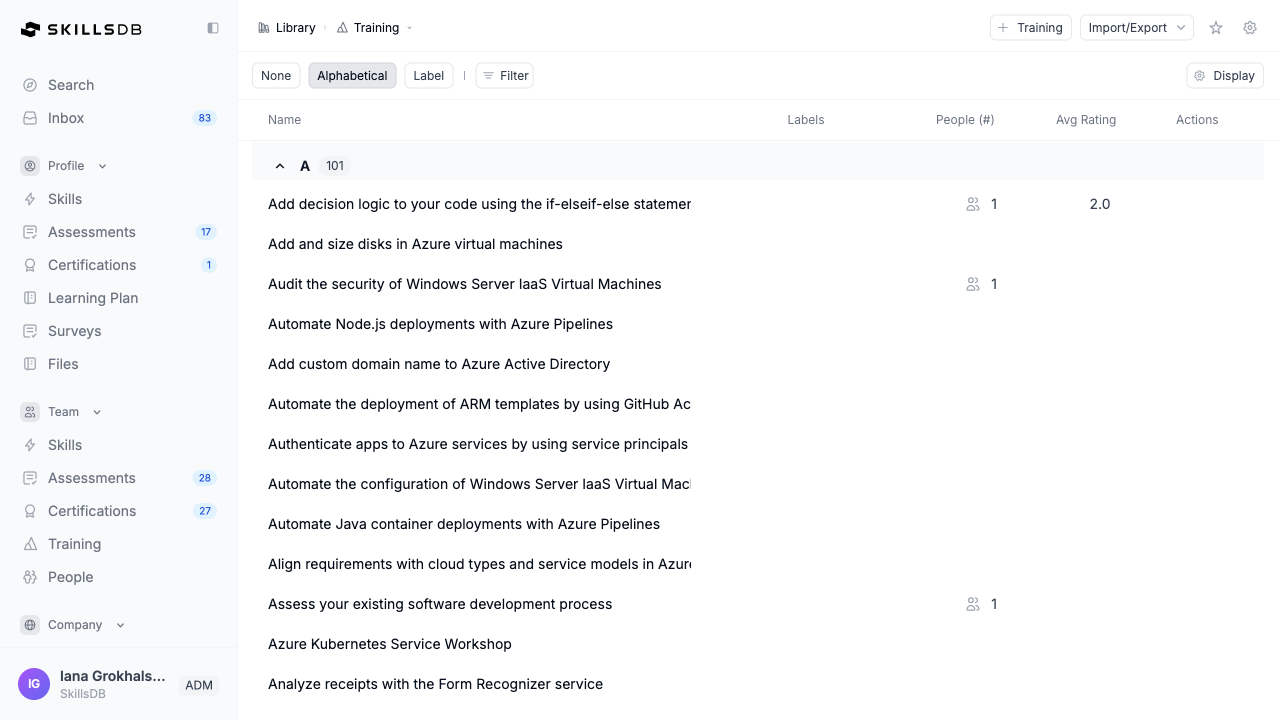
Group By
The library supports five grouping modes, chosen from the Display menu:Columns
Use the Display menu to show or hide columns.
Filters
Add a filter with the + button in the filter row. Available filters: Name, Labels, People, Avg Rating, Cost, Duration, Provider, Format, Audience, and Career.Selection actions
Select one or more resource rows to act on them together. Administrators can select Export to download the selected resources, or Delete to delete them. The delete confirmation, titled “Delete N training resources?”, explains: “They’re removed from the library. This can’t be undone.”Adding a Training Resource
Admins can add training resources directly to the library. Newly added resources are immediately available for assignment.- Navigate to Library > Training.
- Open the Actions menu and select Training resource under Add New (or press ⌘K / Ctrl+K and search for “Add training resource”).
- Enter the training title and complete the optional settings described below.
- Select Continue, then choose a category to create the training. If needed, use Create category to add a category.
Training Form Field Reference
The create and edit dialogs share four settings sections. The title is required. Creation asks for a category after Continue; editing shows the saved category under Training Details.Additional Information
Training Details
Training Attributes
Related Entities
Linking a training resource to skills and careers helps employees discover it through their career profiles and learning paths. Resources linked to a career appear in that career’s detail page.
Viewing a Training Record
Select any resource in the library table to open its detail page.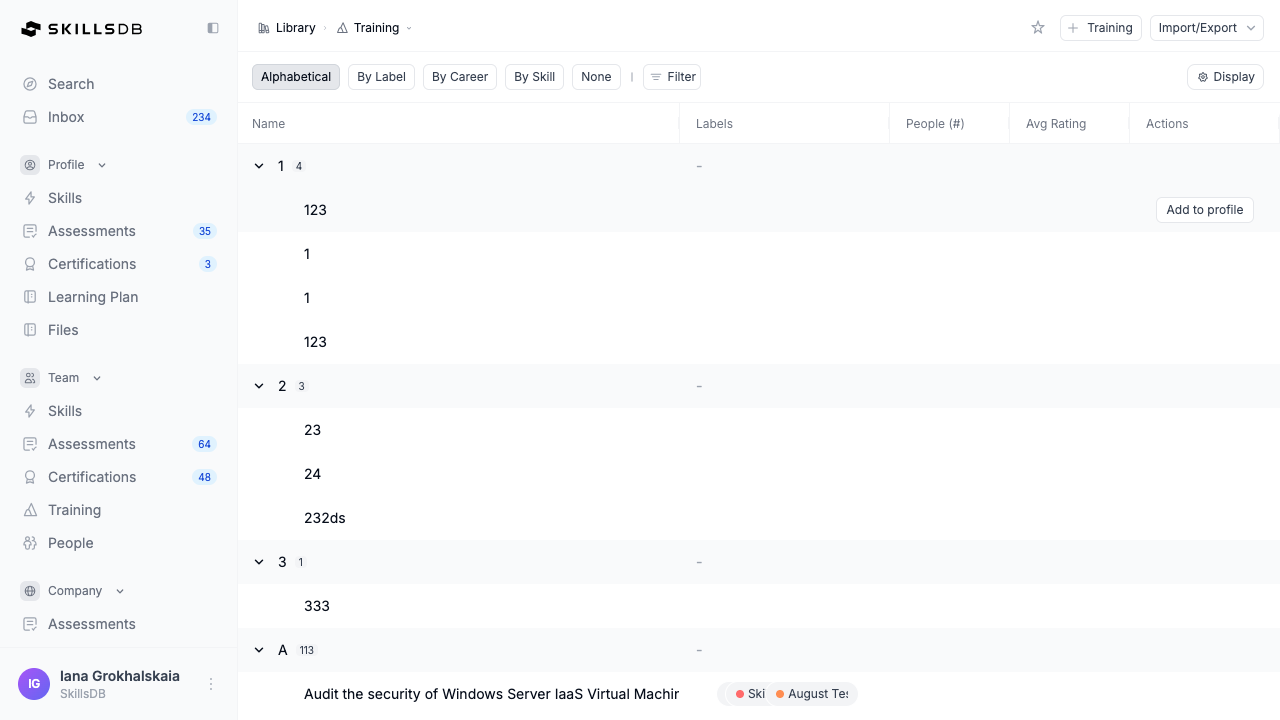 The detail page includes:
- Hero section — Title, description, type badge, and status badge
- Quick stats bar — Duration, Cost, and Provider at a glance
- Training Details card — Category, Training Format, Target Audience, Course Level, and Reference ID
- Related Entities card — Skills and careers this resource is linked to, displayed as chips
- Labels card — Labels applied to the resource (admin view)
- Training Link card — The external URL with an Open Training button
Deleting a Training Resource
Administrators can delete a resource in two ways: select its row in the library table and choose Delete in the selection bar, or open the resource and select Delete under Manage in the Actions menu. Confirm the deletion in the dialog that appears. Deletion is a soft delete — the record is removed from active views but retained in historical data.Assigning Training to People
Admins and managers can assign training resources directly to employees from the library.- In the library table, hover the resource’s row and select the button in the actions column. For managers and above, the button labeled Add to profile opens the assign dialog rather than adding the resource to your own profile. Administrators can also open the resource and select Assign under People in the Actions menu.
- The Assign training to people dialog opens.
- Search for and select the employees to assign the resource to.
- Confirm the assignment.
Employee Suggestions
Employees who do not have admin access can suggest training resources for the library. Suggestions are queued for admin review before being added.How Employees Submit Suggestions
- Navigate to Library > Careers and open a career.
- Open the Actions menu and select Training resource under Suggest (or press ⌘K / Ctrl+K and search for “Suggest training resource”).
- In the Suggest training dialog, complete the form with the resource details.
- Select Submit for Approval.
Reviewing Suggestions (Admin)
Admins review employee suggestions from the Inbox. Select Inbox in the left sidebar, then select the Requests category to see pending training suggestions. Each suggestion shows:- Training — Resource title and how long ago it was submitted
- Status — Pending / Approved / Rejected
- Review — Button to open the two-step review form
- Select Review on a pending suggestion.
- Step 1 — Review and edit the basic details: Title, Provider, Category, Description, Cost, Duration, and URL.
- Step 2 — Complete the training attributes: Course Level, Training Format, Target Audience, and Labels.
- Choose one of the following actions:
- Save — Save edits without approving or rejecting
- Save & Approve — Approve and add the resource to the library immediately
- Reject — Open the rejection dialog; enter a required Reason for Rejection and confirm
Approved suggestions are added to the Training Library and become available for assignment. Rejected suggestions remain in the queue with a Rejected status for audit purposes.
Importing and Exporting Training Resources
Admins can import and export training resources from the page actions menu.Exporting
- Navigate to Library > Training.
- Open the Actions menu and select Export under Data.
- A
.xlsxfile downloads automatically.
Importing
Open the Actions menu and select Import under Data. This opens the import page. See Import/Export for the file format.Export is available to admins only. The exported file includes all visible columns.
Configuring Training Settings
Admins can configure the attribute lists used in the training form — categories, providers, formats, audiences, and course levels. These settings determine the options available when creating or editing training resources. Navigate to Company > Settings and select Configure on the Training Library row. The settings page contains five configurable attribute types:
For each attribute type, admins can:
- Add a new value via the Add button, which opens a configuration drawer
- Edit an existing value by clicking the edit icon on a row
- Delete a value that is no longer needed
- Reorder values by dragging rows into the desired order
Common Questions
Can employees see all resources in the Training Library?
Can employees see all resources in the Training Library?
Yes, when the Training library is visible in your organization. Employees can browse Library > Training and add a resource to their own profile with Add to profile; the message “Training added to your additional training” confirms it. Creating, editing, deleting, importing, and exporting resources are restricted to administrators.
Can I link a training resource to multiple skills?
Can I link a training resource to multiple skills?
Yes. In the Related skills field of the training form, you can select as many skills as are relevant. The resource appears under each linked skill when the library is grouped by Skill.
What happens to assigned training if I edit a resource?
What happens to assigned training if I edit a resource?
Edits to a training resource (title, description, URL, etc.) apply immediately to the resource record. Employees who already have the resource in their Learning Plan will see the updated information.
Can I assign the same training resource to the same person more than once?
Can I assign the same training resource to the same person more than once?
Each person can have a training resource in their Learning Plan once at a time. If the resource has been completed and archived by the employee, it can be re-assigned.
Where do employee suggestions go after approval?
Where do employee suggestions go after approval?
Approved suggestions are added to the Training Library as standard resources. They can then be assigned, edited, and managed like any other resource in the library.
Related Articles
Frontline Training
Overview of training workflows including suggestions, metrics, and team activity
Careers
Linking training resources to careers and enabling training date tracking
Learning Plan
How employees interact with assigned training resources in their Learning Plan
Labels
Applying labels to training resources for filtering and reporting
Need Help?
If you run into any issues or have questions, reach out to your organization’s SkillsDB administrator or contact SkillsDB Support.